Getting up from the floor is easy to ignore until the day it is not. It matters when you play with a grandchild, reach a low cupboard, garden, fix something under a table—or need to recover after a non-injurious slip. Yet most advice treats the movement as a pass/fail test. That is the wrong frame.
Floor access is a trainable sequence, not a party trick. You do not need to stand up with crossed legs and no hands to prove that you are aging well. You need a route that matches your current strength, balance, joint comfort and confidence.
The FitFat AI Floor-to-Stand Ladder breaks that route into five levels. The goal is not to rush to level five. The goal is to own one safe level and preserve the option to progress.
First: practice is not emergency recovery
This guide describes planned practice in a clear space. It is not an instruction to get up immediately after a real fall. After a fall, check for severe pain, bleeding, a possible head injury, an unusual limb position, new weakness, chest pain or dizziness. If you may be injured, cannot bear weight, or feel unsafe, call for help rather than forcing yourself upright.
Do not begin floor practice alone if you have recently fallen, fainted, had surgery, have unstable heart symptoms, severe vertigo, a known fracture risk that has not been assessed, or cannot comfortably kneel. A physiotherapist can build an alternative route.
The CDC's STEADI programme treats falls as a multi-factor problem involving strength and balance, medication, vision, footwear and home hazards. One movement drill cannot replace that wider assessment.
Set up a practice lane
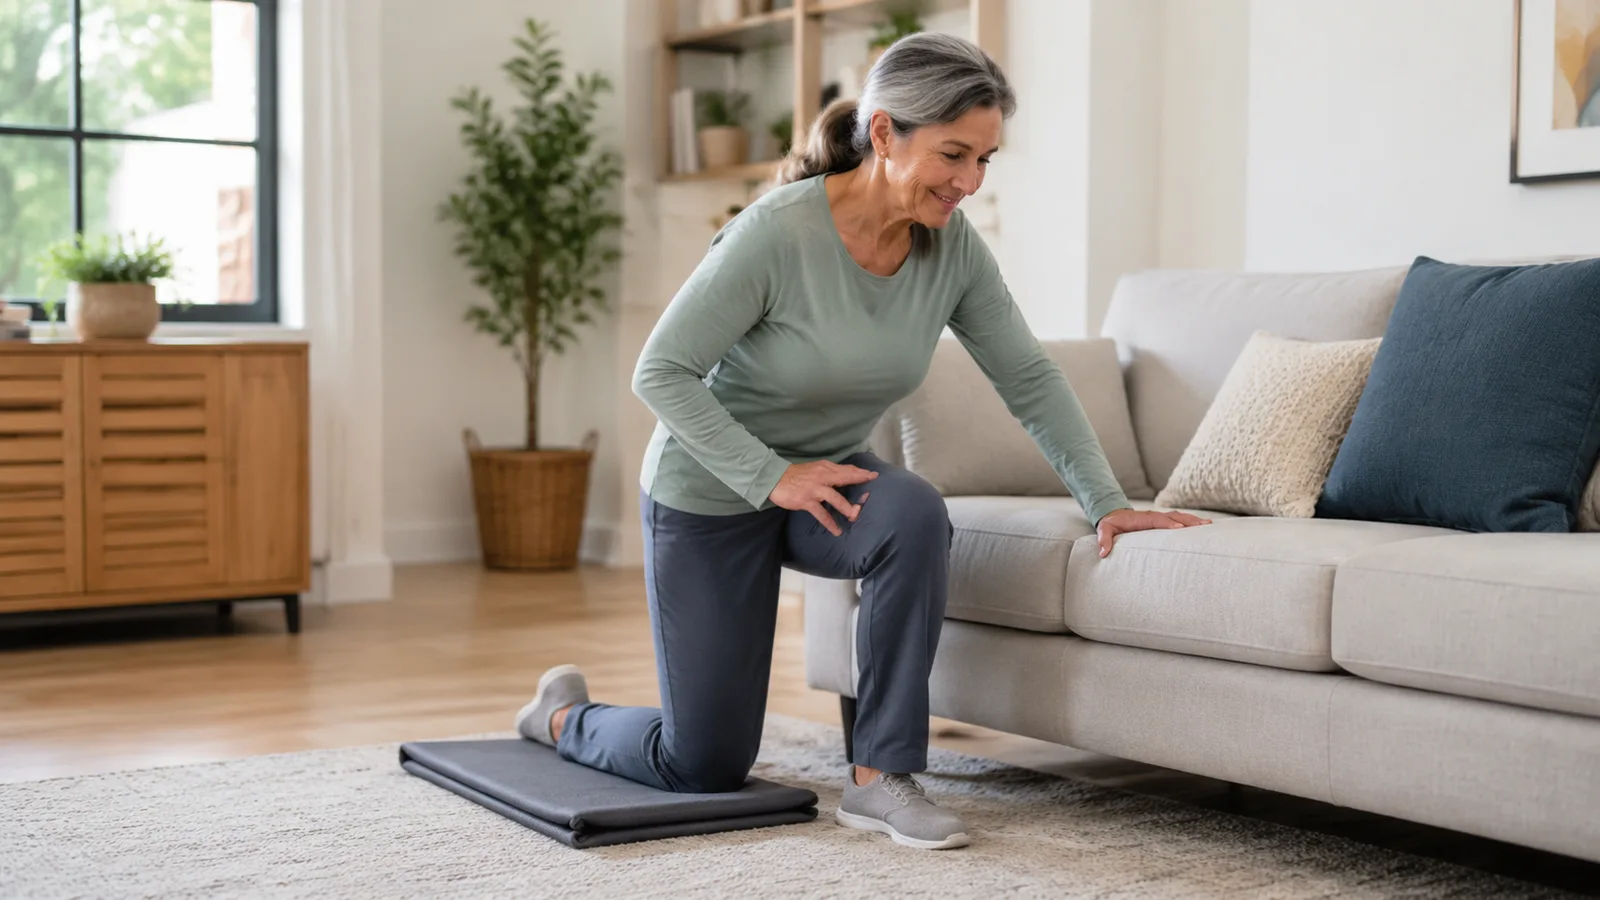
Choose a firm floor—not a slippery rug—and place a folded mat beside a stable sofa or heavy chair that will not slide. Keep a phone within reach. A second person can stand nearby without pulling on you.
Use the three-point rule: before changing level, know where three reliable contacts are available. They might be two feet and one hand, or one foot, one knee and one hand. Slow transitions are useful because they reveal where control disappears.
Level 1: chair height control
Start above the floor. Sit near the front of a firm chair, place your feet about hip-width apart and stand using the armrests or a countertop as needed. Lower back down in three quiet seconds.
Practice three to five repetitions. The lowering phase matters: it trains the control needed before a knee or hand approaches the floor. If you drop into the chair, move to a higher seat or use more hand support.
Ready to progress when: you can complete five smooth repetitions without holding your breath, collapsing into the seat or feeling that a knee will give way.
Level 2: high-kneel rehearsal
Place a thick folded mat beside the sofa. From standing, hold the sofa with both hands, step one foot slightly back and lower that knee onto the mat. Keep the other foot planted in front, creating a supported half-kneeling position. Reverse the route immediately: lean forward over the front foot, press through that foot and use the sofa to return to standing.
This is not a lunge competition. Shorten the range and add cushions if kneeling pressure is uncomfortable. If kneeling itself is not appropriate, remain at level one and work with a professional on a different route.
Level 3: half-kneel to side-sit
From supported half-kneeling, bring the second knee to the mat. Move one hand to the sofa, rotate your hips and lower onto one side. Reverse the exact sequence: side-sit, hands to support, both knees, one foot forward, then stand.
The important skill is route memory. Practise on both sides only if both are comfortable; many people will have one preferred route. A reliable preferred route is more useful than two uncertain ones.
Level 4: controlled floor pause
Complete your supported route to a seated or side-lying position and pause for two calm breaths. Then identify your next three contacts before moving. The pause separates control from momentum.
Try one complete descent and return, not ten. Floor transitions are whole-body work. Quality often declines before people notice fatigue.
Level 5: reduce support, not safety
Only after several comfortable sessions should you consider using one hand instead of two, choosing a slightly lower support, or making the movement more fluid. Remove one aid at a time. Do not remove the mat, support and nearby person simultaneously.
Unsupported standing is optional. Hand use is not failure; it is a sensible strategy. In real life, furniture, a stair, a stable bench or another person may be part of the safest route.
The two-repetition practice dose
This is a skill session, not a conditioning workout:
- Perform two chair rises as a warm-up.
- Practise your current floor-ladder level once on the preferred side.
- Rest and check for pain, dizziness or unusual breathlessness.
- Repeat once only if the first attempt felt controlled.
- Finish with two calm chair rises.
Two high-quality routes, two or three times a week, are enough to preserve familiarity while your regular strength and balance work builds capacity.
What progress actually looks like
Progress is not merely using fewer hands. It can mean less hesitation, quieter contact with the floor, a more stable front foot, easier breathing, or remembering the sequence without panic. Those are real improvements.
Stop the session if you develop sharp pain, chest pressure, new dizziness, sudden weakness, loss of balance that your support cannot control, or symptoms that persist after resting. New difficulty rising from a chair or floor can also be a reason to seek assessment rather than simply training harder.
Why this belongs in a complete programme
Adults 65 and older are advised to combine aerobic activity, muscle strengthening and balance work. Chair rises develop leg strength; supported transitions add coordination; regular walking and resistance training build the capacity underneath the skill. The floor ladder connects those pieces to an ordinary task.
The best level is the one you can repeat calmly. Preserve the route first. Make it elegant later.
Sources
- CDC STEADI: Older Adult Fall Prevention
- CDC STEADI Patient and Caregiver Resources
- CDC: Physical Activity Guidelines for Older Adults
- World Health Organization: Physical Activity and Sedentary Behaviour
Review note: This is general movement education, not a falls assessment or rehabilitation plan. Reviewed August 24, 2026.
Reviewed under our editorial policy. Please also read our medical disclaimer.